
Choose a paint roller according to wall texture, paint type and the required finish. Smoother surfaces usually need a shorter nap; rough surfaces need a longer nap to reach the texture. The paint container instructions and technical data sheet remain the final reference. Before using it throughout the project, test the roller with the actual paint on a small area and inspect it after drying.
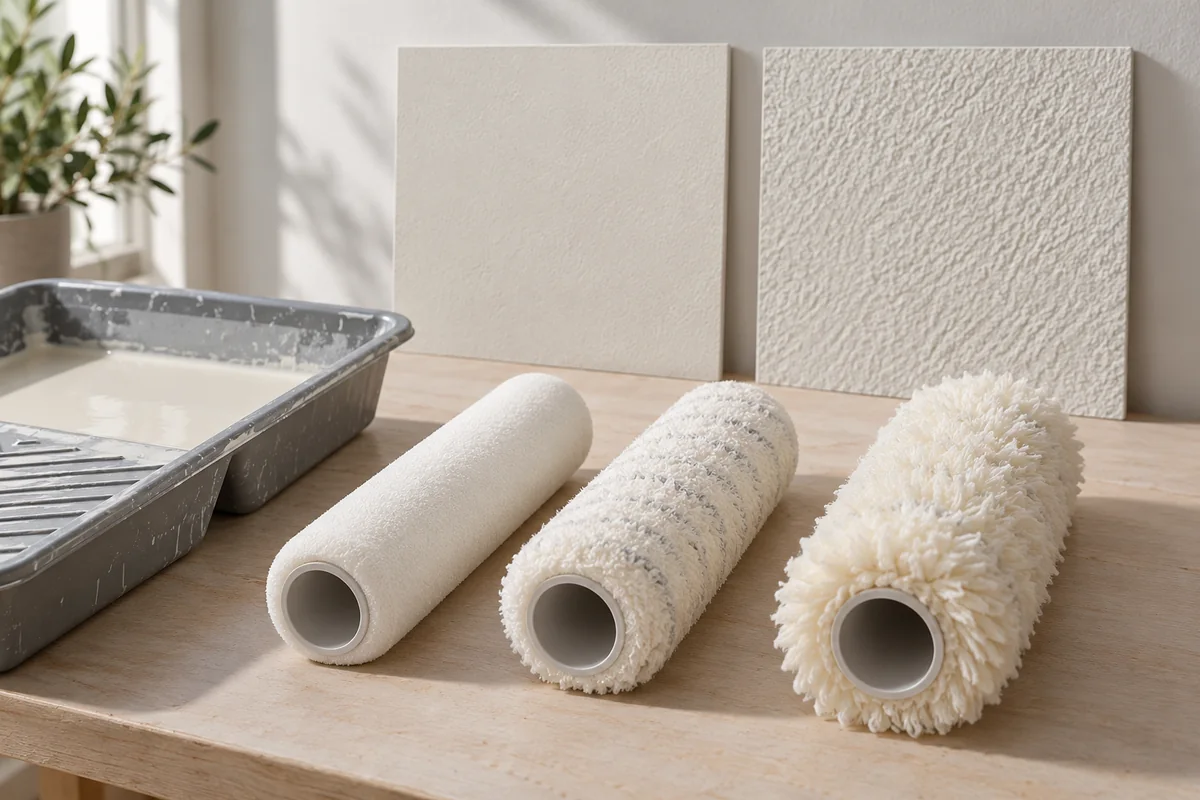
You may choose a suitable living-room colour and then find the texture more visible than on the sample. The roller, application method or wall preparation may be responsible. This guide explains what to compare when selecting a roller or discussing it with the painter, so you approve colour and texture together.
Roller width is different from nap length
Roller packaging may show two measurements: the roller width that covers the wall area and the length of the fibres, or nap. Two rollers of the same width can produce different textures because their nap differs.
Width affects access: a wide roller suits open areas and a smaller one suits narrow sections. Nap selection starts with the surface and paint. Photograph the roller-cover specifications when approving the sample, not just the handle, so you have a useful record for later touch-ups.
What roller nap length suits your walls?
The following are illustrative recommendations from Benjamin Moore’s roller-cover selection guide, rather than a fixed specification for every paint:
- Around 6 mm: An example for surfaces with little texture, such as certain doors and cabinets.
- Around 9.5 mm: An option listed in the guide for ordinary walls and ceilings.
- Around 13 mm: An example for moderately rough or textured surfaces.
- Around 19 mm or longer: For rougher surfaces, such as certain textured plaster and masonry finishes.
Do not select a longer nap solely because it holds more paint. A dense nap may leave a stronger texture on a smooth wall. Changing the roller will not correct uneven walls or putty marks; see wall preparation with putty and primer before painting.
Check roller-cover compatibility with the paint
A roller cover has a material composition, not just a size. Some types suit particular paints better than others. Sherwin-Williams’ roller selection guide explains that selection depends on the paint and surface, and distinguishes between synthetic, natural and blended covers.
Take the product name and sheen or a photo of the container information. Check the tool recommendation in the technical data sheet and ask for a low-shedding cover. Do not accept “an excellent roller” without checking its suitability for the actual paint and wall.
Sherwin-Williams’ technical paint-application FAQs explain that paint viscosity, surface absorption and the required finish affect nap selection. Follow the specific product recommendation rather than using one roller size for every room.
How should you approve a roller trial before painting?
- Prepare a representative wall section: Use an area matching the agreed surface condition and preparation, away from damaged sections needing different treatment.
- Use the actual product: Use the approved paint, colour and sheen with the proposed roller cover.
- Record the trial details: Record cover type, nap length, application method and any thinning permitted by the product instructions.
- Allow the required drying time: Do not judge texture and sheen while the paint is still wet. If a second coat is needed, observe the specified recoating interval.
- Inspect the sample in place: Review it in daylight and under the room’s lighting from the usual viewing angle.
If the cover or paint changes after sample approval, check the new result rather than assuming a match. For scheduling, read the guide to paint drying and second-coat timing. A useful sample documents how to achieve the required finish, not just its colour.
Why do roller marks or differences in sheen remain?
The roller is one factor. See Benjamin Moore’s explanation of paint lap marks: joining fresh paint to an area that has started drying may produce a darker colour or different sheen. Maintaining a wet edge and working in manageable areas can reduce this problem.
Plan pauses at suitable natural boundaries and use the recommended paint quantity and application method. Do not add water arbitrarily because the roller feels heavy, or repeatedly roll over areas that have started drying. Identify the cause of any difference visible after drying before repainting.
At handover, compare the result with the approved sample. Record the location and photograph the whole wall with a close-up; this is clearer than an enlarged photo without its location.
Paint roller FAQs
Does a short nap always produce a smooth finish?
Not always. The result also depends on the wall condition, paint and application method. Start with the technical recommendation and test it.
Can the same roller be used for walls and ceilings?
Possibly, if it suits the paint and both surfaces. A textured ceiling differs from a wall with little texture, so compare each surface’s requirements.
What should I ask the painter before starting?
Ask about cover material and nap length and request a sample with the approved paint. Agree on the finish texture and inspection conditions before painting the whole area, so tool selection is based on a result you can see.